
Title: The Head Nodon
Author: Jim
Article Type: 101
Date Published: 7/30/2021
Date Updated: NA
XP Level: Beginner
Nodon Featured: Head
Nodons Used: Head, Camera, Box, Texture, Stick Movement
Typical Time Required: 30 minutes
The Head Nodon
This is one of the more unusual Nodons available in Game Builder Garage. It only has a few uses but they can be critical to the success of your game. It is the only way to display a HUD, if you are doing a first person game or any game in which your viewpoint spans more then one screen. A HUD which stands for Heads Up Display is any status items you wish your player to see. This includes things like a score, health, special items obtained etc. These items are usually displayed at all times and stay in the same place on the screen regardless of the players movements.
Start a New Project. Get into edit mode with the plus button on your JoyCon. Place a Head Nodon by going to the Objects > Game Screen / Camera > First Person > Head item and selecting it. This will place a Head Nodon in the center of your screen.

The most notable thing about the Head Nodon is the lack of any Input or Output Ports. In fact all it has is an upper connection port. Go ahead and select the Head Nodon and then select the gear icon to go into settings.
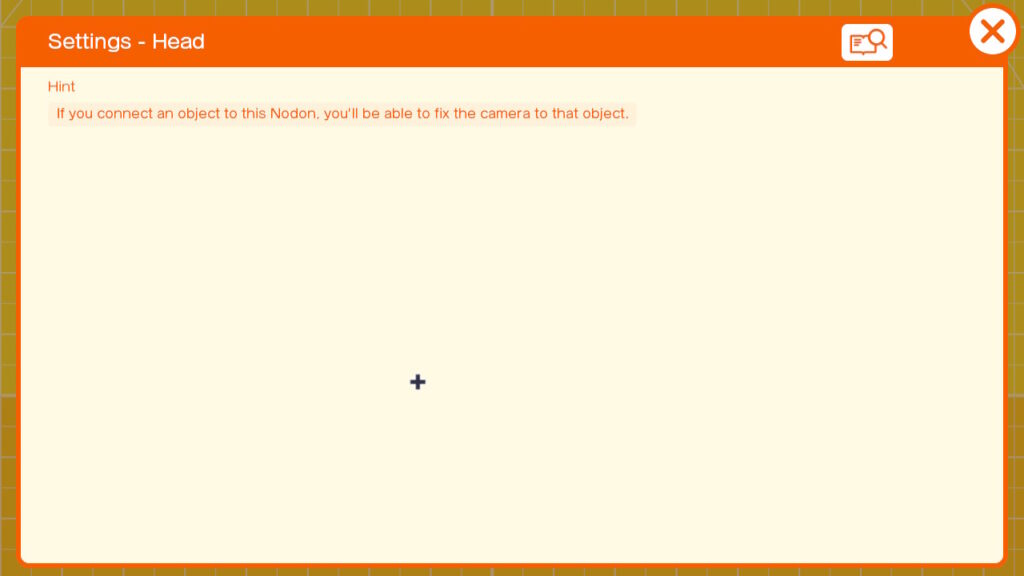
Wow no settings! There is only the enigmatic Hint shown. Let’s go into Nodopedia by selecting the note card magnifying icon on the top right.
A very brief Nodopedia entry as well. The important details are in the Upper connection port section. Items connected to this Nodon will connect to an invisible box which has the dimensions displayed. The important detail is that they will be connected 8.00 meters in front of the camera on the Z axis.
It appears that the main use of this Nodon is to connect items to the front of the camera, so that they are always in view. Perfect! That is what we need for our HUD.
At the bottom of this Nodopedia entry there is a section called Other. This indicates in addition to connecting items to the front of the camera you can also use a touch sensor to detect when the camera is directly pointed at it. In my experiments the line of sight is actually quite thick and is probably 0.50m x .040m. It does extend beyond the 8.00m of the invisible box though.
Let’s play with this a bit to see how it works. Exit out of the Nodopedia by pressing the B button twice.
Add a box by going to Objects > Simple Objects > Box. Move the Box Nodon to the left of the Head Nodon and then connect the two together by connecting the upper connection port of the Head Nodon to the lower connection port of the Box Nodon. Go into the Settings of the Box Nodon and select Connection Point. We want our own connection point to be Z- and the target connection point is Z+.
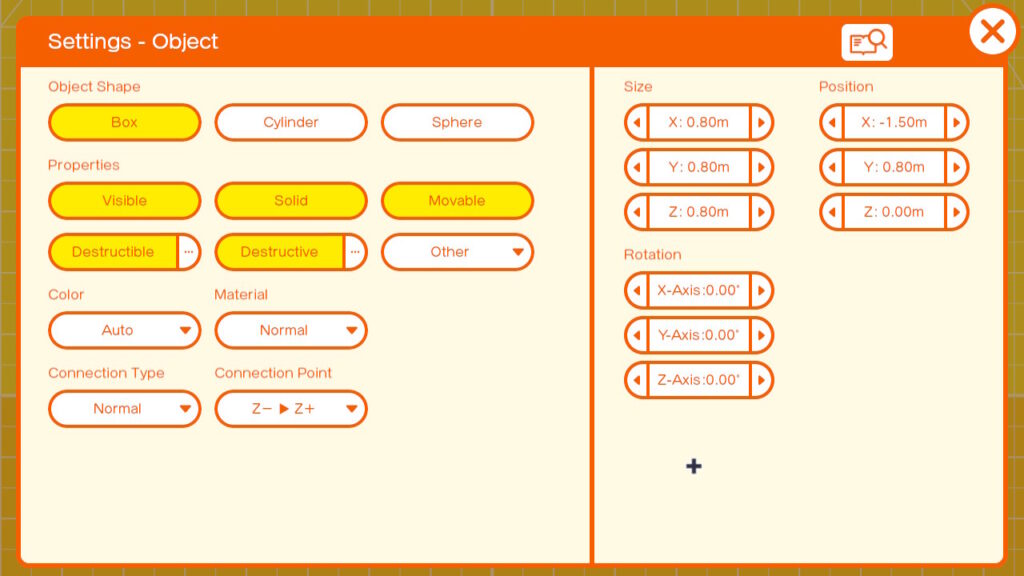
Note: This is a critical setting. Without it the box will not appear in front of the camera.
Exit out of the settings by pressing the B button twice.
Let’s run this and see if the box is indeed in from of the camera. You should see a yellow box as shown here.
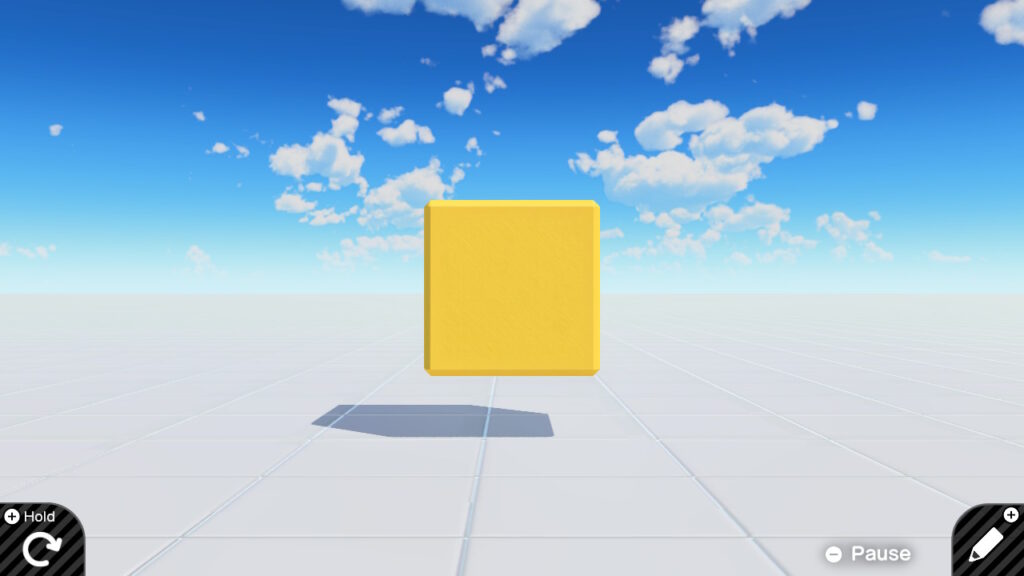
As you can guess this box is 8 meters in front of the camera. Press the Plus button to go back into edit mode.
We will now add some Nodons that will allow us to move the camera around, so that we can see if the box does indeed move with the camera. Go to Objects > Game Screen / Camera > Camera
This will add a camera. Move it to the left of the Box Nodon. Now add two stick Nodons. Input > Stick Movement > L > Up/Down and Left/Right.
Move these to the left of the Camera Nodon. Connect the Output port of the Up/Down to the Camera Nodon Up/Down and connect the output of the Left/Right Stick to the Camera Horizontal. It should end up looking something like this.
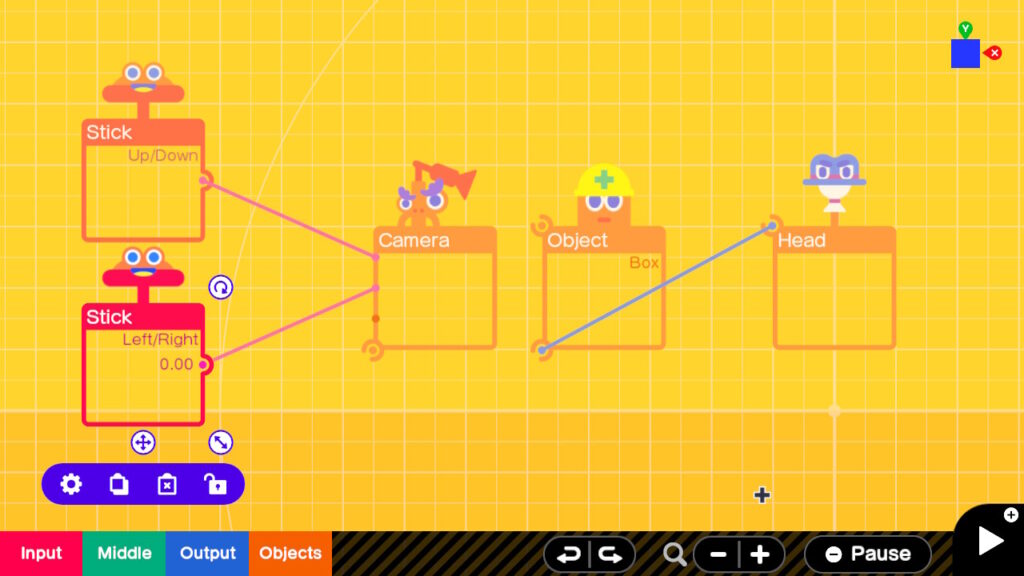
Press the Plus button to try this out. Try panning the camera to the left and right and up and down with the left JoyCon stick. The yellow box should stay in front of the camera.
So you are saying impressive, but what good is a moving yellow box for our HUD. In our next experiment we will add a targeting sight which you might see in a shooter type game.
Exit Game mode by pressing Plus button.
Let us add a texture which we will use as a sight for our shooter. Select Objects > Special Objects > Texture
This will add a Texture Object. Go into Settings of the Texture object with the gear icon. Select Texture Face. This will bring up the Faces the Texture will be applied to. Make sure that only Z- is selected (yellow). Close the dialog. In the main settings page you will see what looks like a simple drawing program. Use the tools to draw a large + sign centered in the drawing. Use a bright color like orange or red.
Tip: Use the directional buttons on the left JoyCon to draw straight lines. This can be difficult using the sticks.
It should look something like this.
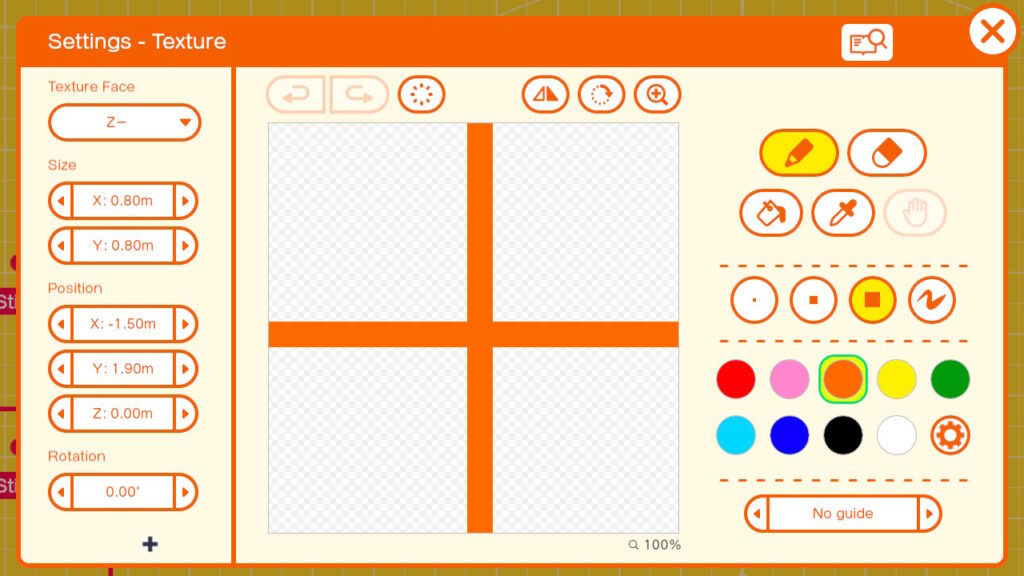
Note: The parts of the drawing with the white and light gray checkerboard will be transparent when the texture is displayed.
Exit the Settings. Connect the lower connection port of the Texture Nodon with the Upper connection port of the Box Nodon. The Texture will now paint on the Z- side of the box. Go into the settings of the box and turn off the settings of Visible, Destructible, and Destructive. Exit the settings when through.
Run the game using the Plus Button on the JoyCon. Should see your sight on screen. Try panning it around with the left joystick. Now we are getting somewhere. We have demonstrated that we can keep an object in view regardless of where the camera is pointing.
You are probably thinking; Aren’t most status items in games at the top or sides of the screen. That is true, but you are not limited to using just the box that is connected to the camera. You can stack boxes on top of the Head connected box to place items on top. Once you have boxes stacked to the top you can add boxes to the sides of the top box to add status items across the top and then work your way down the sides too if needed. Each box can contain a texture for pictures, Number Objects for scores or other numerical stats or Text Objects if you want to show text. Complex compound objects such as Slide Connectors can be used for graphs and placed in one of the boxes.
This will be covered in more detail in a future Demo to be published. For now here is a picture of a sample HUD demonstrating the use of multiple boxes to show status for various things.

Here it is in the editor. Note how the boxes are connected to each other.
Here is the HUD in action. There is a map in the upper left, note the texture from the edit screen. The Blue dot represents the player, a key is in the middle top is also a texture applied to a box, several text and number boxes are on the top right in blue.
That’s it for the Head Nodon.
Summary : In this 101 level tutorial we explore the Head Nodon and how it can be used to place objects on screen and in front of the camera at all times. We demonstrate using this to create a targeting sight and discuss how it can be used to construct a HUD.