
Title: The Play Sound Nodon
Author: Jim
Article Type: 101
Date Published: 8/06/2021
Date Updated: NA
XP Level: Beginner
Nodon Featured: Play Sound
Nodons Used: Play Sound, Button Press, Stick Movement, Map, Timer
Typical Time Required: 15 minutes
The Play Sound Nodon
One of the Nodons that enable us to add sounds to our Game Builder Garage creations. I am going to cover both Play SFX and Play Instrument together in this article as they both really place the same Nodon on screen. The only difference is which default sound is in the settings. The Play SFX Nodon defaults to the Done System Sound and the Play instrument Nodon defaults to Piano C note. The other Sound related Nodon is the Play BGM Nodon. This Nodon allows you to play one of 10 musical themes which you can customize a bit by changing instruments for various parts of the arrangements. The Play BGM Nodon will be covered in another article. On with the Play Sound Nodon.

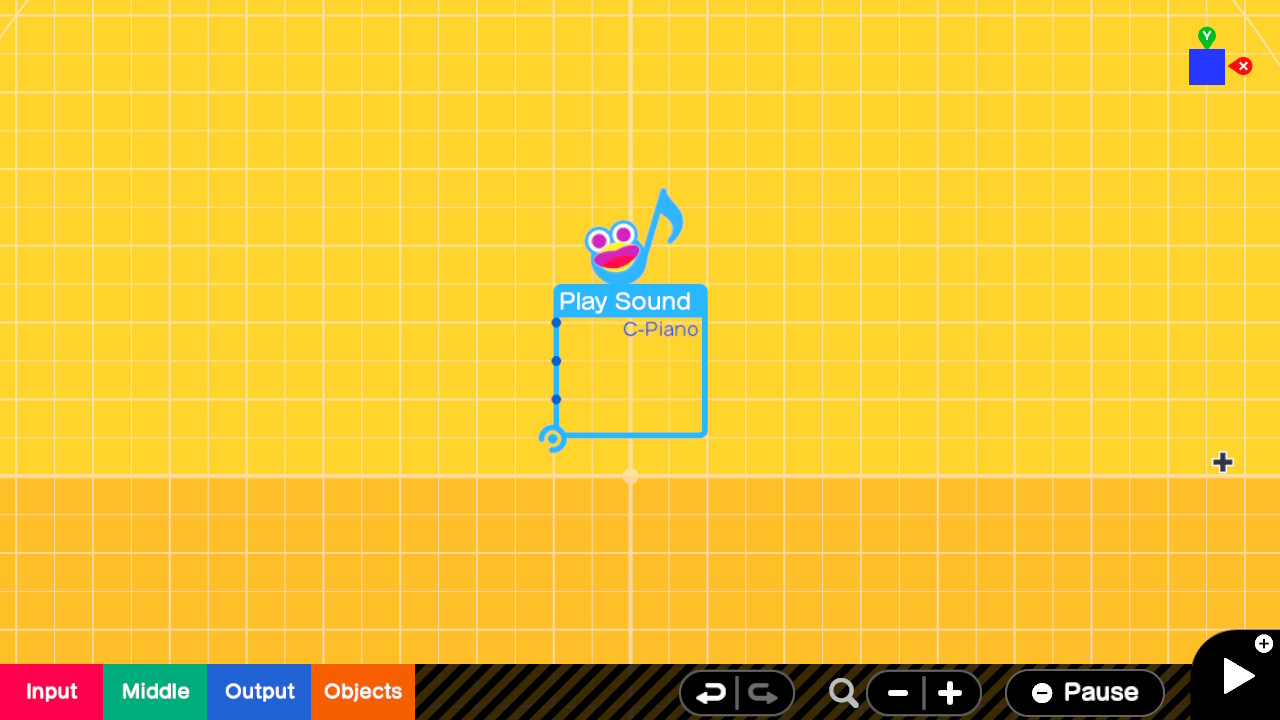
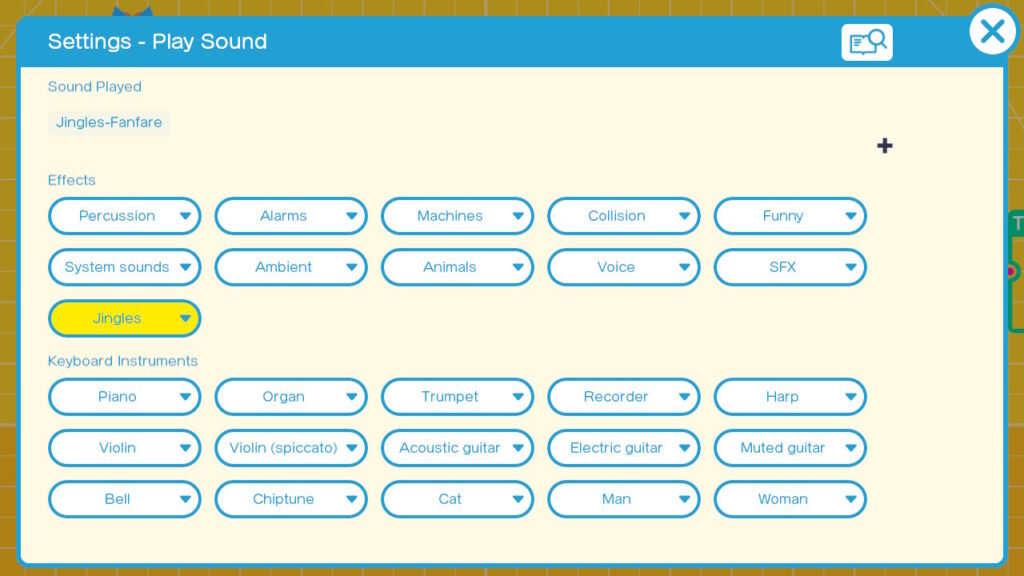
Place a Play Sound Nodon into your game by going to the Menu Output > Play Sound > Play Instrument. Let’s look at it’s Settings. Wow a lot of options here. The upper section has various sound effects you can play within your game. There is a pretty good selection of various sounds in different genres and some include sounds that loop. The loop instruments play for as long as you apply a non zero input into the Play input. Al in all pretty good selection. If you need a short musical snippet there are also Jingles which may work for you.
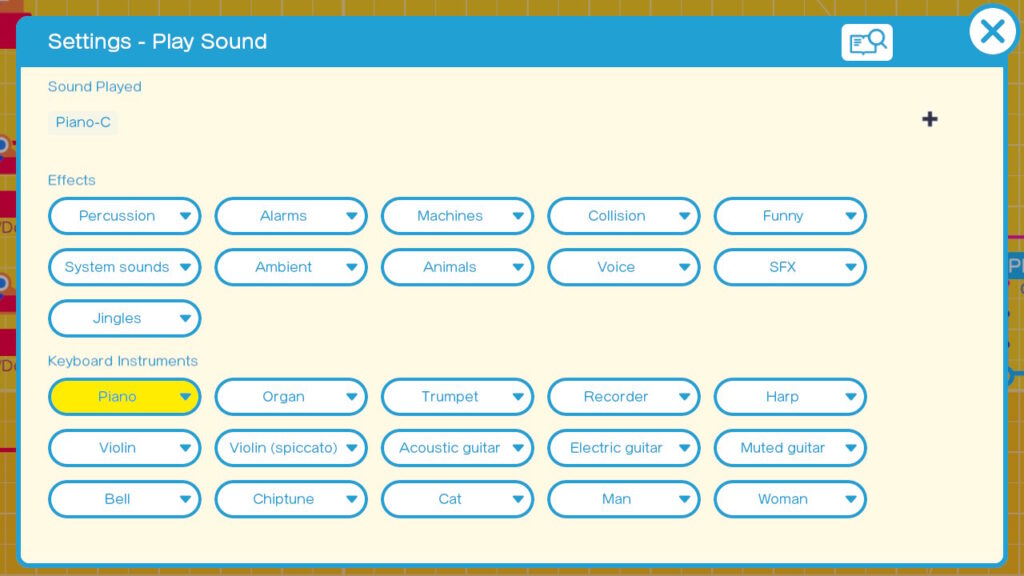
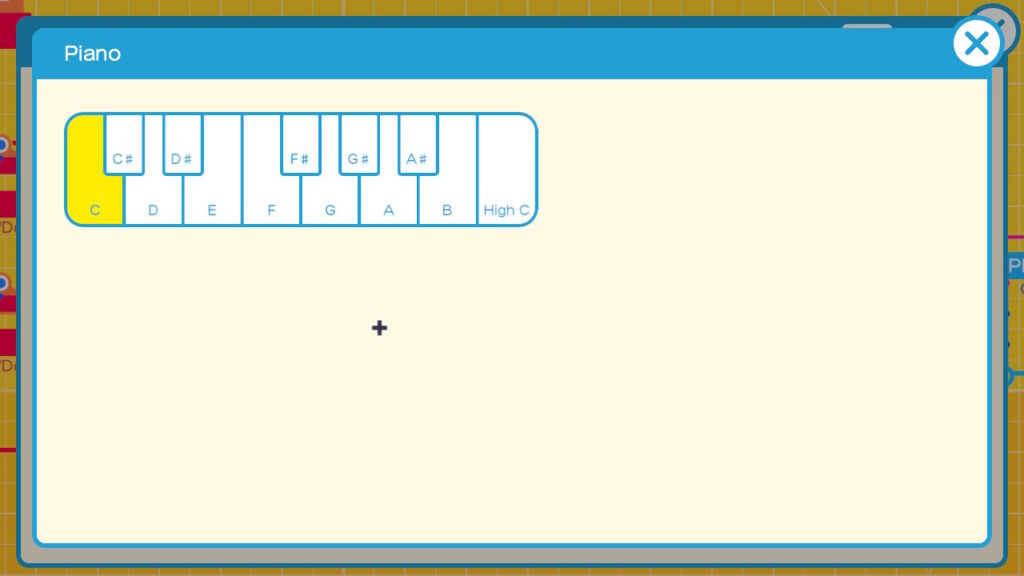
In the lower section we see what they call Keyboard Instruments. Some of these like the violin obviously are not Keyboard instruments as we may think of them, but are more like the instruments you might see on a synthesizer. If you select any of them you will go into their settings in which you will see a small one octave keyboard in which you can select which note will play.
Exit out of the keyboard if you are viewing it. Go ahead and select the Nodopedia icon at the top right. We can see that there are 3 inputs. There is a play port which we can use to trigger a sound to play. There is a volume port which allow us to control the volume using values of 0 for no volume and 2 for max volume. The default value if you don’t use this port is 1. Finally there is a pitch port which allows you to control the octave the sound plays at. In the case of the instrument notes this would potentially give you a 5 octave keyboard. For sound effects it would allow you to make the sounds lower or higher pitched. This port accepts values of -2 to 2. Note that the sound will play for as long as the Play input has a non zero input. Once that input goes to zero the sound will stop.
If you are using the Play Sound Nodon for musical Notes and wish to change the octave use a Constant to precisely change the pitch. 1 and 2 for one and two octaves above the default and use -1 and -2 to go one and two octaves below the default.
Interestingly this Nodon has a lower connection port which when connected to an object will vary where the sound is coming from. In a moving object the sound will also move and the volume will get higher as the object approaches the camera and lower as the object moves away from the camera. It will also pan between the left and right speakers as the connected object moves left and right. This is all in reference to the camera.
Exit out of Nodopedia and then exit out of the Settings. Lets setup a test rig to see what these inputs do.
Place a Input > Button Press > Y and connect this to the Play port of the Play Sound Nodon.
Lets use Input > Stick Movement > L > Up/Down for the Volume Control and Input > Stick Movement > R > Up/Down for the Pitch control.
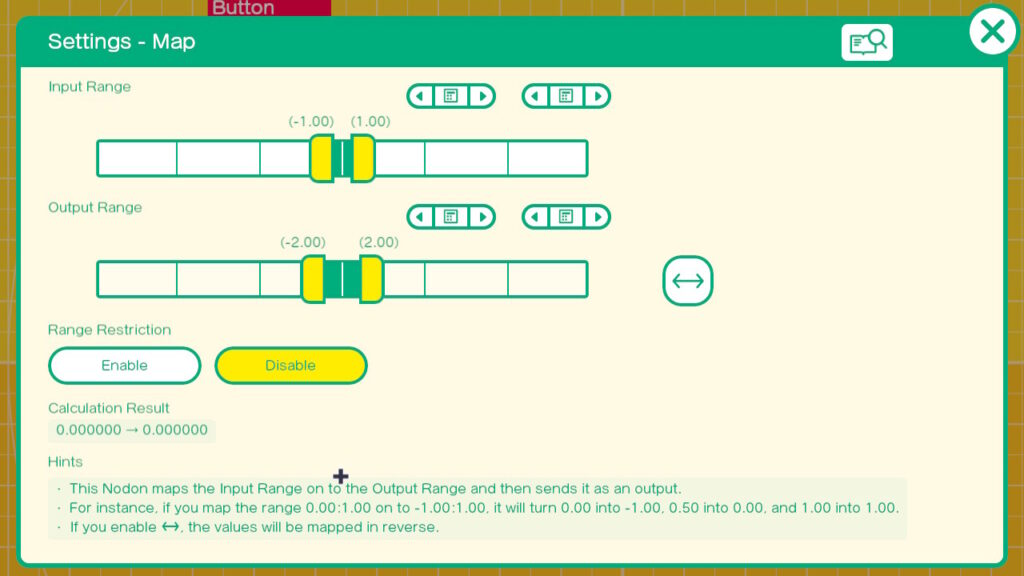
We will also use two Middle > Convert > Map to convert the stick movements into values we can use.
Layout the Nodons and connect them up something like this. The top stick is the L stick and the bottom stick is the R stick.

Open up the settings of the top Map Nodon. Set the Input range to -1 and 1. This matches the output of our JoyCon. Set the Output range to 0 and 2. This is the range expected by the Volume Input on the Play Sound Nodon.

Open up the settings of the lower Map Nodon. Set the input range to -1 and 1. Again matches the JoyCon. Set the Output range to -2 to 2. These are the values the Pitch input of the Play Sound Nodon expect.
Finally go into the settings of the Play Sound Nodon and select a sound you wish to experiment with. I selected Jingles-Fanfare. Any of the Jingles or Looping sound FX should work . We want something that will play long enough, that we can use the JoyCons to change the volume and pitch while it is playing.
Go ahead and start your game with the Plus Button. Press the Y Button once so that you can hear the sound unaltered. Then press Y again and vary the Pitch or volume. If desired you can go back into the Editing mode and pick a different sound to see how the Pitch and volume controls effect the new sound.
Most of the sound effects (SFX) and Jingles probably work fine, by placing one Play Sound Nodon and triggering the Play input at the correct point in your game. What about the Notes in the Keyboard instruments. To play any type of tune you will need to play a series of notes in a sequence. I have successfully used Timer Nodons with Play Sound Nodons. Here is an example of how these are connected to play 3 notes for .5 seconds each and .5 seconds apart.
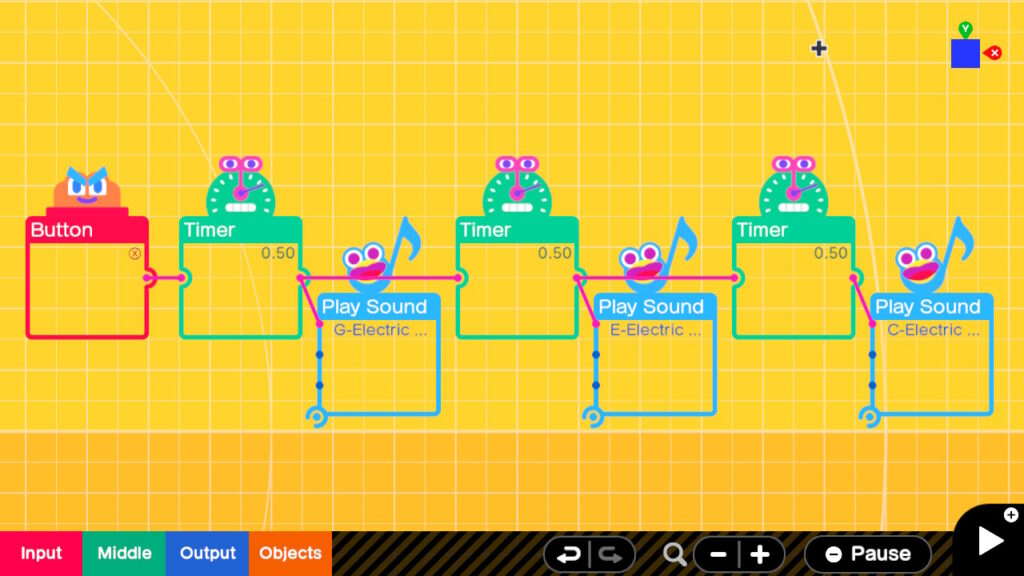
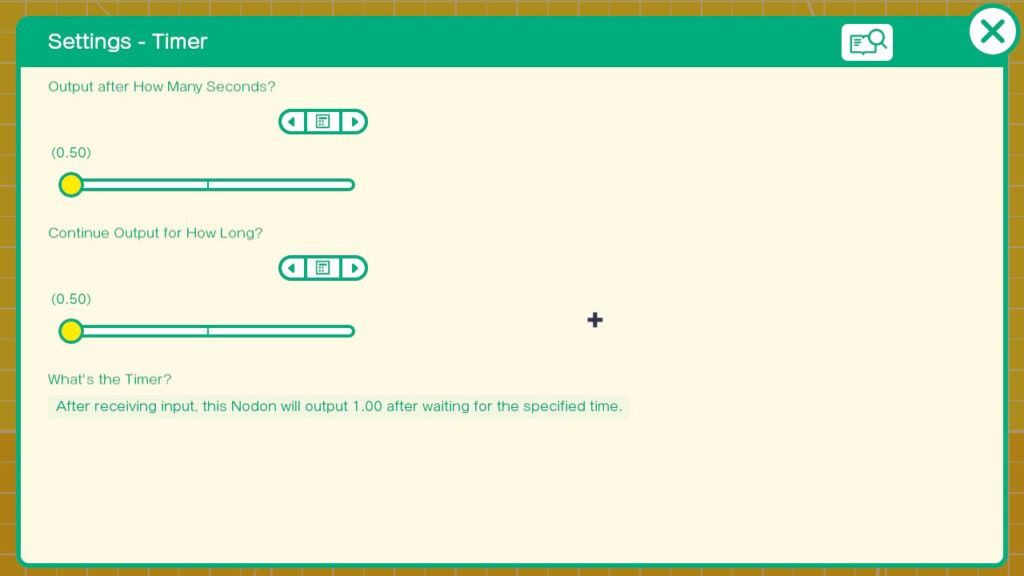
The sounds are started by the X Button. The left most timer is triggered by the X button and .5 seconds later sounds a note and also triggers the next timer. This continues till all 3 notes are played. If you wanted this to loop endlessly you could have the last timer trigger the first timer. The key for the timers is to set the ‘Output After How many Seconds’ for the pauses between Notes including the time the previous Note Plays. The setting ‘Continue Output for How Long’ is the amount of time you want the Note to play. You can use sub second times such as the half second (0.5) I use in this example.
In this way you can tediously craft entire tunes. If you want a pause between notes you can place a timer that doesn’t trigger a note or manually adjust the time between notes. You can even do multiple tracks using more then one instrument. Multiple notes can also be played simultaneously for chords. One Timer can trigger more than one Play Sound Nodon if desired.
Summary : In this 101 level tutorial we discuss the Play Sound Nodon and how it is configured. For simple cases adding and configuring this Nodon is straight forward. We discussed how your own original tunes can be created using Play Sound Nodons and Timer Nodons in combination.